Difference between revisions of "Debugging with GWT"
From OpenKM Documentation
| Line 29: | Line 29: | ||
<center>[[File:Okm_dev_guide_017.jpeg|770px]]</center> | <center>[[File:Okm_dev_guide_017.jpeg|770px]]</center> | ||
| + | |||
| + | |||
| + | Now you can run ( better if you run in debug mode, you can set breakpoints in your eclipse code ). It'll appear some screen like this: | ||
| + | |||
| + | |||
| + | <center>[[File:Okm_dev_guide_017.jpeg|500px]]</center> | ||
| + | |||
| + | |||
| + | To debug login put in your browser | ||
| + | http://localhost:8080/OpenKM/com.openkm.login.Main/index.jsp?gwt.codesvr=127.0.1.1:9997 | ||
| + | |||
| + | To debug frontend first atuthenticate and after it, put in your browser | ||
| + | http://localhost:8080/OpenKM/com.openkm.frontend.Main/index.html?gwt.codesvr=127.0.1.1:9997 | ||
| + | |||
| + | <center>[[File:Okm_dev_guide_018.jpeg|500px]]</center> | ||
[[Category: Developer Guide]] | [[Category: Developer Guide]] | ||
Revision as of 16:46, 10 March 2010
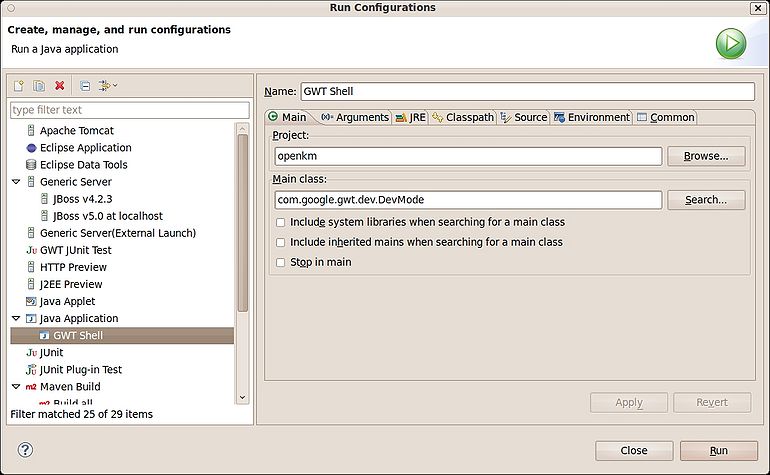
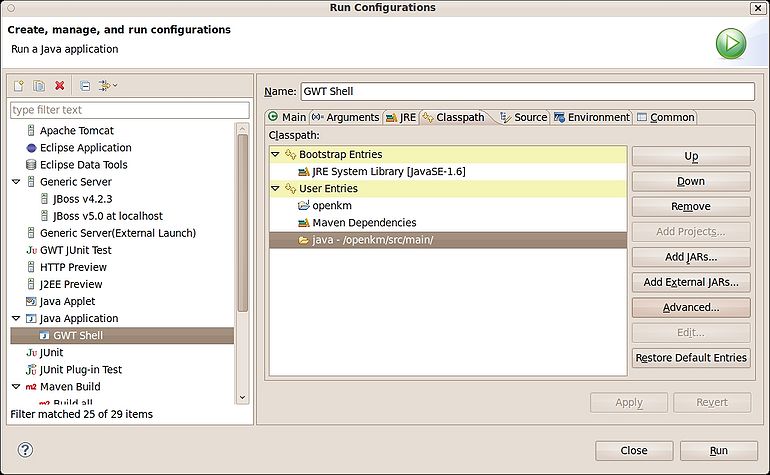
Go to run configurations and add new java application configuration as you can see in this screenshoot
Set the Main class
com.google.gwt.dev.DevMode
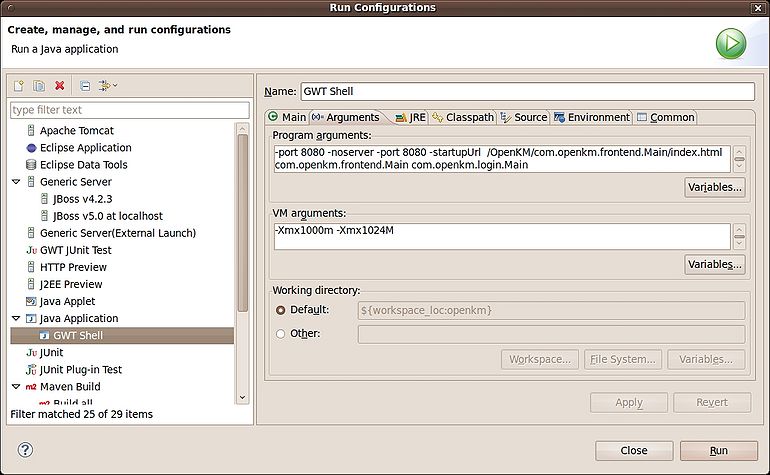
Set the program arguments
-port 8080 -noserver -port 8080 -startupUrl /OpenKM/com.openkm.frontend.Main/index.html com.openkm.frontend.Main com.openkm.login.Main
and the VM arguments
-Xmx1000m -Xmx1024M
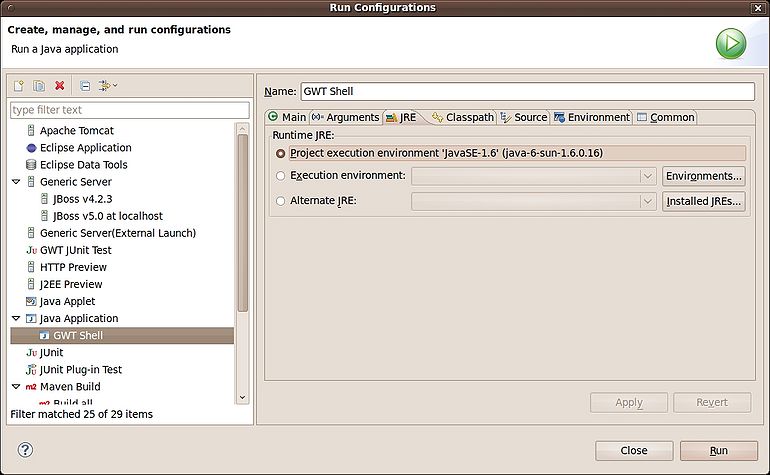
Set the jdk 1.6
Set the class path. Pay special attention in adding folder /openkm/src/main ( using button advanced and add folder option )
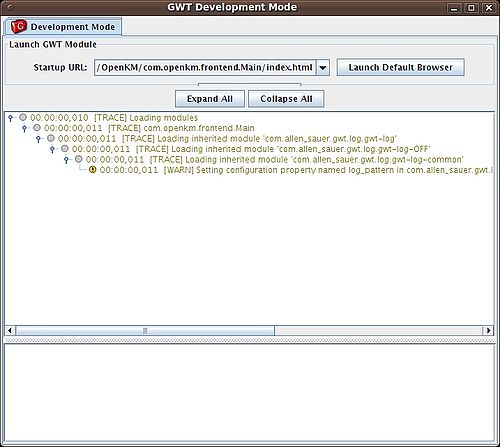
Now you can run ( better if you run in debug mode, you can set breakpoints in your eclipse code ). It'll appear some screen like this:
To debug login put in your browser
http://localhost:8080/OpenKM/com.openkm.login.Main/index.jsp?gwt.codesvr=127.0.1.1:9997
To debug frontend first atuthenticate and after it, put in your browser
http://localhost:8080/OpenKM/com.openkm.frontend.Main/index.html?gwt.codesvr=127.0.1.1:9997
