Configure Tomcat service windows
Running as a Windows Service
Configure OpenKM in windows as service need some extra work because are several tomcat versions depending your hardware architecture.
We recommend before starting with installation have some good test editor application like Geany because will be needed modify some xml files.
Step 1 - Download OpenKM Bundle
Download from sourceforge.net the latest OpenKM bundle, name will be something like openkm-X.X.X-community-tomcat-bundle.zip.
Uncompress zip file at c:\. It will create a c:\tomcat-7.0.27 folder. Rename c:\tomcat-7.0.27 folder to c:\openkm
| At the moment we have writting documentation the latest version is openkm-6.2.4-community-tomcat-bundle.zip |
Step 2 - Select your tomcat
- http://archive.apache.org/dist/tomcat/tomcat-7/v7.0.27/bin/apache-tomcat-7.0.27-windows-x86.zip
- http://archive.apache.org/dist/tomcat/tomcat-7/v7.0.27/bin/apache-tomcat-7.0.27-windows-x64.zip
- http://archive.apache.org/dist/tomcat/tomcat-7/v7.0.27/bin/apache-tomcat-7.0.27-windows-i64.zip
Uncompress zip file at c:\. It will create a c:\tomcat-7.0.27 folder
| At this point we got two folders c:\openkm which contains OpenKM bundle and tomcat-7.0.27 which contains tomcat in correspondence with your hardware architecture |
Step 3 - Modify context.xml files
Modify file c:\tomcat-7.0.27\conf\context.xml.
3.1 - After line:
<WatchedResource>WEB-INF/web.xml</WatchedResource>
Add lines:
<ResourceLink global="jdbc/OpenKMDS" name="jdbc/OpenKMDS" type="javax.sql.DataSource"/>
<ResourceLink global="mail/OpenKM" name="mail/OpenKM" type="javax.mail.Session"/>
Step 4 - Modify server.xml files
Modify file c:\tomcat-7.0.27\conf\server.xml.
4.1 - After line:
<Listener className="org.apache.catalina.core.ThreadLocalLeakPreventionListener" />
Add lines:
<!-- Automatically reload log4j configuration -->
<Listener className="com.openkm.util.Log4JInitializer" configFile="${catalina.base}/conf/log4j.properties"/>
4.2 - Into the tag <GlobalNamingResources> add the lines:
<Resource auth="Container" driverClassName="org.hsqldb.jdbcDriver" maxActive="100" maxIdle="30"
          maxWait="10000" name="jdbc/OpenKMDS" password="" type="javax.sql.DataSource"
          url="jdbc:hsqldb:${catalina.base}/repository/okmdb" username="sa"
          validationQuery="select 1 from INFORMATION_SCHEMA.SYSTEM_USERS"/>

<Resource name="mail/OpenKM" auth="Container" type="javax.mail.Session"
            mail.smtp.host="localhost" mail.from="testing@openkm.com"/>
4.3 - Modify line:
<Connector connectionTimeout="20000" port="8880" protocol="HTTP/1.1" redirectPort="8443"/>
To
<Connector address="0.0.0.0" connectionTimeout="20000" port="8880" protocol="HTTP/1.1" redirectPort="8443"/>
Step 5 - Copy or overwrite files from c:\openkm to c:\tomcat-7.0.27
List of files:
- c:\openkm\OpenKM.cfg
- c:\openkm\OpenKM.xml
- c:\openkm\PropertyGroups.xml
- c:\openkm\conf\log4j.properties
- c:\openkm\bin\setenv.bat
- c:\openkm\conf\log4j.properties
- c:\openkm\lib\javassist-3.11.0.GA.jar
- c:\openkm\lib\jstl-1.2.jar
- c:\openkm\lib\jta-1.1.jar
- c:\openkm\lib\log4j-1.2.17.jar
- c:\openkm\lib\log4j-initializer.jar
- c:\openkm\lib\mail-1.4.5.jar
- c:\openkm\lib\mysql-connector-java-5.1.12-bin.jar
- c:\openkm\lib\tomcat-juli-adapters.jar
- c:\openkm\lib\unicode.ttf
- c:\openkm\lib\sigar ( entire folder )
- c:\openkm\bin\tomcat-juli.jar ( overwrite )
- c:\openkm\webapps\OpenKM.war
| Maintain relative $TOMCAT_HOME when copy or overwrite. For example c:\openkm\OpenKM.cfg should be copyed to c:\tomcat-7.0.27\OpenKM.cfg |
Step 6 - Install tomcat as service
| In oficial Apache tomcat website you can find information about how to Configure Tomcat as service in window, is not trivial understand. |
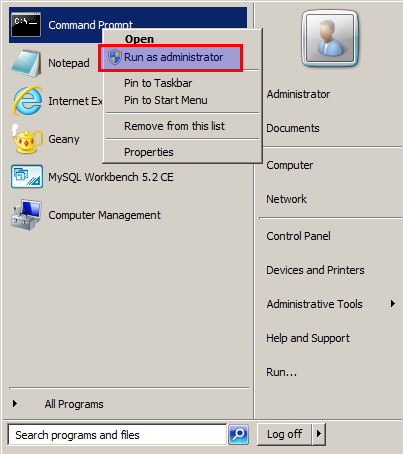
6.1 Open windows terminal as administrator.
6.2 Go to folder bin if you have followed all steps should be c:\tomcat-7.0.27\bin
6.3 Execute the commands:
service.bat install
tomcat7 //US//Tomcat7 -JvmMx 1024
tomcat7 //US//Tomcat7 ++JvmOptions="-XX:MaxPermSize=256m"
tomcat7 //US//Tomcat7 ++JvmOptions="-XX:PermSize=128m"
tomcat7 //US//Tomcat7 ++JvmOptions="-Djava.awt.headless=true"
tomcat7 //US//Tomcat7 ++JvmOptions="-Dfile.encoding=utf-8"
| here we've configured tomcat to use only 1024mb, depending your harware resource that can be changed |
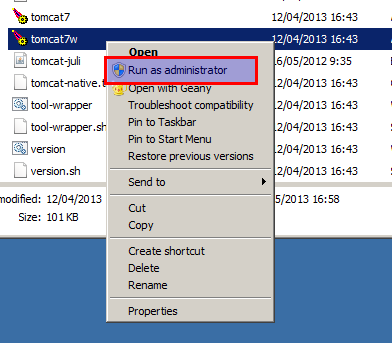
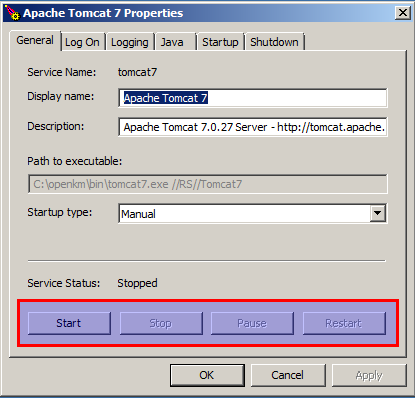
6.4 Execute tomcat7w as administrator.
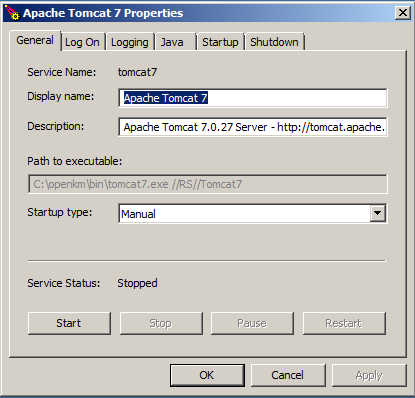
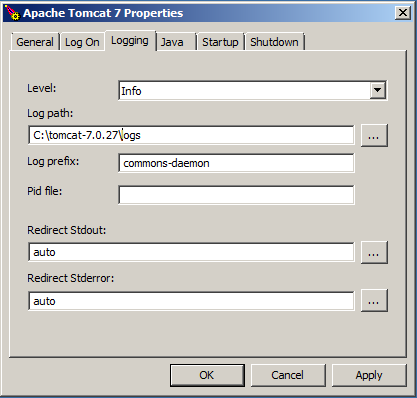
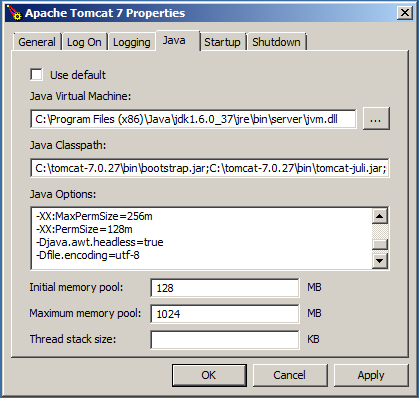
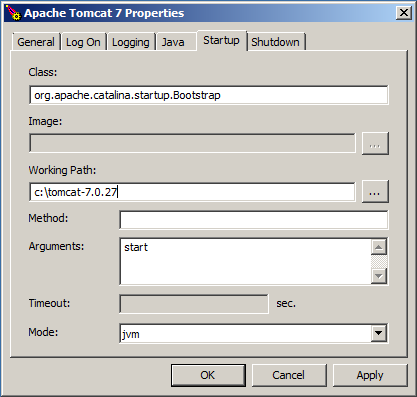
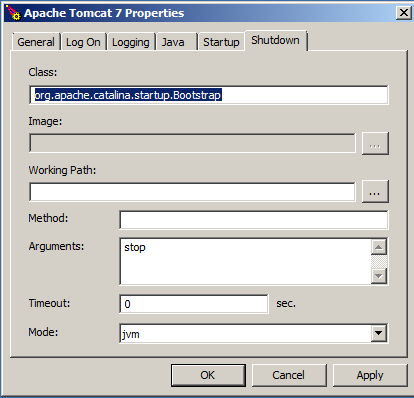
Take a look at configuration parameters. Configure Service as manual or automatic.
Step 7 - Configure environment variables
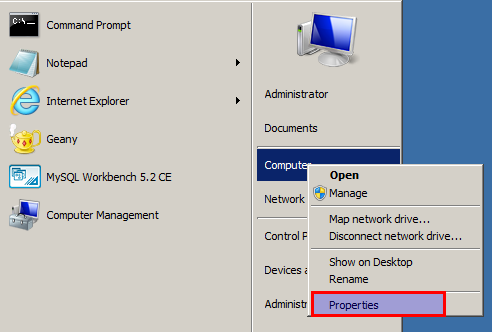
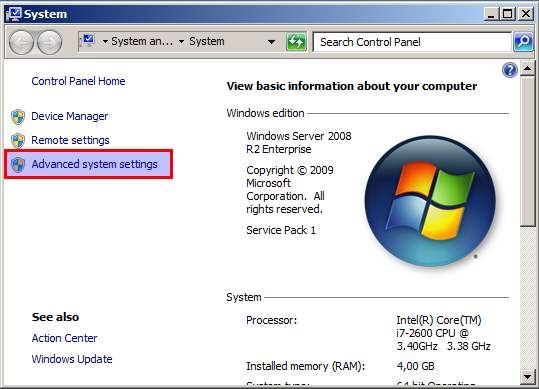
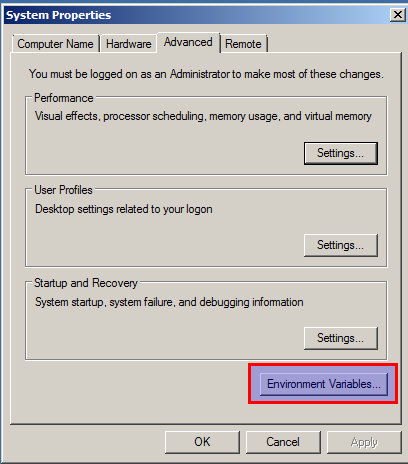
Open environment variables:
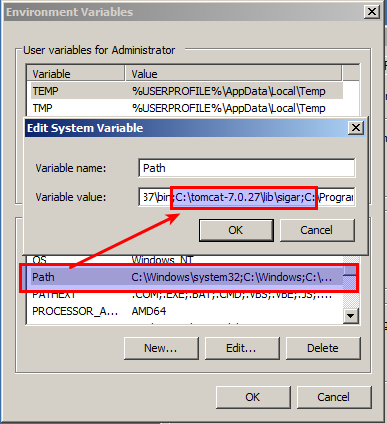
Add sigar folder path - c:\openkm\lib\sigar\ - to your environment path:
Step 8 - Start openkm service
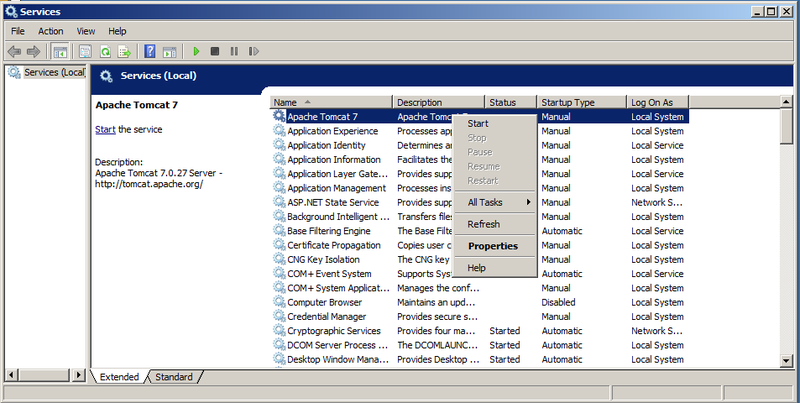
You can start OpenKM service from windows service panel or from tomcat7w.exe utility. In both cases you can start / stop OpenKM service.
or
